It is vital that changes to your Magento 2 site are never deployed direct to your live site. All changes should be thoroughly tested on a development site before being applied to live.
Creating a dev site is actually a service we can perform for our customers for a one-off fee of £35.
However, for those who want to do this themselves here are the details.
There are a few steps involved. In this example we are assuming a separate subscription for the two different sites (live / dev) While there are good reasons for using the same subscription (eg pre-live test site) for better security installing the dev site on a seperate user user account is best.
If you would prefer a dedicated magento 2 hosting environment altogether we can provide this also.
Summary
- Create a new subscription in plesk for your Magento 2 dev site
- Replicate php settings from live
- Replicate apache and nginx settings from live
- Rsync files between subscription
- Reset ownership on files
- Create a new database and user
- Dump database to sql file
- Replace the old Username in the sql file with the new user
- Import DB
- Edit env.php to point to the new db instance / redis databases / varnish host:port
- Edit base urls in database
- Edit Elastic Search Port / prefix
- Remove static links
- Clear cache / rebuild static files and reindex.
In Detail
1) Create a new subscription
In Plesk from the subscription menu create new and fill in the blanks.
2) Replicate php settings from live
Cut and paste all settings from the live site to the new site.
3) Replicate apache and nginx settings from live
Copy all settings from the live site to dev.
4) Rsync files between subscription
As we are working across user accounts we will need to switch to root
sudo su
run rsync
rsync -r -a -v /var/www/vhosts/live-site.com/httpdocs/ /var/www/vhosts/dev-site.com/httpdocs –exclude=/var/www/vhosts/live-site.com/httpdocs/pub/media/catalog/product/cache
This will take a while. We have excluded the image cache as this will be recreated on demand and there is no point wasting disk space.
5) Reset ownership on files
chown -R dev-user:psacln /var/www/vhosts/dev-site.com/httpdocs
chown dev-user:psaserv /var/www/vhosts/dev-site.com/httpdocs/pub
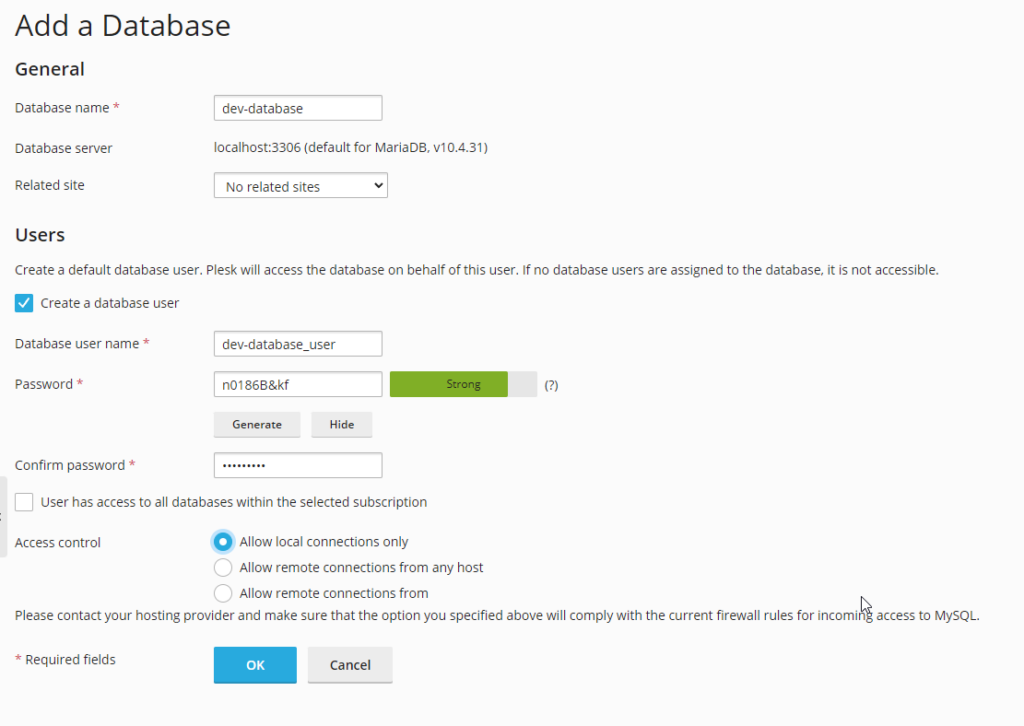
6) Create a new database and user
In plesk add a new database in the dev subscription

7) Dump database to sql file
mysqldump -uadmin -p`cat /etc/psa/.psa.shadow` live-database > /var/www/vhosts/dev-site.com/livedatabase.sql
8) Replace the old Username in the sql file with the new user
sed -i ‘s/live-database-user/dev-database_user/g’ /var/www/vhosts/dev-site.com/livedatabase.sql
9) Import DB
mysql -uadmin -p`cat /etc/psa/.psa.shadow` dev-database < /var/www/vhosts/dev-site.com/livedatabase.sql
10) Edit env.php to point to the new db instance and redis databases
Switch to the site owner
su – dev-user
Use you favourite editor to change the database definition in app/etc/env.php. Also, change redis DB / varnish host:port or any other site specific settings. (typically we would use docker containers for each)
11) Edit base urls in database
Use phpmyadmin to change the base urls in core_config_data to point to your dev site.
12)Edit Elasticsearch Port / prefix
Also in core_config_data edit your elasticsearch port and / or prefix. It is a common error to leave the dev site pointing to the same ES instance / prefix which can cause a lot of confusion.
13) Remove static links
As you have changed the path you will need to clear all static links
cd /var/www/vhosts/dev-site.com/httpdocs/pub/static
find . -type l -ls -exec rm {} \;
14) Clear cache / rebuild static files and reindex.
cd /var/www/vhosts/dev-site.com/httpdocs/
/opt/plesk/php/7.4/bin/php bin/magento cache:flush
/opt/plesk/php/7.4/bin/php bin/magento setup:static-content:deploy -f en_GB en_US
/opt/plesk/php/7.4/bin/php bin/magento cache:flush
Provided that your DNS is pointing to your server then you can now open the site in a browser.
